Sunday, April 29, 2012

FREEDOM: Holiday in Bright, Victoria - Pt 1


My husband and I love to visit Bright - he has good friends (N & I) who retired there after working their entire lives in Adelaide. They were avid skiers and used to ski the surrounding alpine mountain slopes of this lovely Victorian town. We so look forward to spending some quality time with them as (N & I) are fellow wine lovers and foodies like us. There is always good wining and dining on these trips.

Many tourists go to Bright for the beauty and quaint country feel...... and it is a hop, skip and jump to day tours into the snow in the ski season.

We were there over the last week, celebrating my Birthday and our 10th Wedding Anniversary. To be honest - it's any excuse to get there in the cooler months for me!

I'm blogging the holiday in three parts for your viewing pleasure!

After about 1000 kilometres - we have 71 to go!


The beautiful Autumn leaves provide a welcome.


At LAST - the entry into Bright.


The town centre - and the returned servicemen's memorial.


More Autumn display outside the main street pub.


Top of main street.


Looking back down the shopping strip.


Pretty lane ways.


We had a coffee overlooking the Ovens River in the Riverdeck Cafe.


One of the Caravan Parks enjoying riverside plots.


A walkway over the Ovens River.


Gorgeous place to sit and see what's in the picnic basket!


Further down the river path.


Pretty, pretty, pretty.


Our Holiday House.


Cyclamens on our front porch.


It's sad that we didn't stay longer. But it was the first time we left our dog, Rubie, for longer than a day. She holidayed with my brother and his two mini schnauzers......and she coped really well. I was so relieved. It made me feel sick in the stomach to leave her. We received regular texts, emails and emailed photos to prove she was happy. A BIG step for this little family.

I'll post the inside pictures of our holiday house and more shortly.

It's nice to go away, but there is no place like home.


Thursday, April 19, 2012

COOKING: Cantonese BBQ Pork


Don't you just love that BBQ pork that you get in Asian restaurants that is moist on the inside and glazed dark red on the outside, and sliced delectably on your plate??


Well - I found this packet in the Supermarket..... and decided to give it a go.


Now - I must confess "packet" food usually scares me. Just check out the amount of salt, sugars, preservatives and assorted other chemicals that you cannot pronounce...... scary right!?! I justified this purchase by saying it is not an everyday occurrence, in fact it is rare event, so my internal organs will forgive me.  Sometimes we tired cooks need a little break huh???

I managed to get 800 grams of Pork Fillet at a great price (on sale) yay!


And I trimmed off any obvious fat or membrane.


 Along with this packet sauce - I added extra Dark Soy Sauce (2 Tbspns), 1 Tbspn Honey, and 1 Tbspn chopped garlic from a jar. I added the contents of the sauce packet and mixed all this around in the glass baking dish.


Turn the fillets and refrigerate overnight - turning the fillets when you remember.


Next day - preheat the oven to 200 degrees C (400 F). Roll the fillets once more in the marinade. Find a baking tray and cover with foil. Place a rack on the tray and lay the fillets onto the rack. Place into the oven. Roast 35 minutes - with REGULAR basting. I think I basted every 8-10 min.


Done. Cover with foil while finishing the glaze.

In a small saucepan, scrape the leftover marinade into the pan and add 2-3 Tbspns water. Bring this to the boil and let boil for a minute or so.

Put the pork on a board and slice on an angle with a sharp knife.

Use this glaze to pour over the sliced pork. I served the pork with stir-fryed veggies and steamed rice.


It was a hit. And it was SO EASY!!!!!


All requested that this is cooked again in the future!  


And to my Pork loving Friend Lynny........you will love this!


Sunday, April 15, 2012

COOKING: Mediterranean Turkey Scrolls


I was cruising around my local supermarket, when I had the inspiration for this dish. In fact - I saw these in a chicken version in the "ready to stick in your oven and bake" range of chickeny things..... and in my normal "cocky" manner - I thought I could steal the idea and improve on the original.


INGREDIENTS: (Serves 4 - 2 scrolls per person)


  • 500g lean Turkey Mince (you could use lean Chicken instead)
  • 2 sheets Puff Pastry - thawed
  • About 20 leaves of Fresh Sage (or you could use oregano)
  • 2 Spring Onions - finely sliced
  • 1/2 Brown Onion - finely chopped (really fine)
  • 120g Feta Cheese
  • 60g Sun Dried Tomatos (herbed is good) (you could use preserved red capsicum instead)
  • 50g Baby Spinach Leaves
  • 2 Teaspoons Chicken Stock Powder
  • 1 Teaspoon Crushed Garlic (in jar)
  • Freshly Ground Black Pepper
  • Salt
  • A dash of Full Cream Milk
  • Spray oil

METHOD:

Practice your knife skills and chop the sage, spring onion and brown onion as small as you can.


Grab a medium bowl and put the mince, stock powder, a few grinds of black pepper into it. Add in the sage, both types of onion and the garlic. Add a pinch of salt but be careful as the stock powders are fairly salty.


Mix by hand until it is well combined. Pre-heat your oven to 190 degrees C    (375 F).

Put half the mixture onto the puff pastry and leave a good 2-3cm edge free of mix. Do the same with the other pastry.

Cut your feta into little cubes and dot over the turkey mix.


Chop the sun dried tomatoes into small bits and dot over the turkey mix.


Ensure the spinach is well washed and remove the stalks as you tear the leaves and place on top.


Start rolling.


Grab a small pastry brush and paint the clear edge with milk to help the pastry stick together on the final roll.


Find a sharp knife and slice off a small section from each end - I cut off about 1.5 cm. Stand them upright.


I also poked through a toothpick to help the pastry stay together.....but I don't think I needed to. With your cooking spray, give the scrolls a light spray front and back - this will help with the browning.


I put some baking paper on a tray and baked them for 30 mins or so. I took mine out when the pastry was nice and golden.


Yay!


Serve with a simple Greek Salad.

NB: I only baked one of the two prepared pastries. The second one is in the fridge for baking tomorrow. You could freeze this though - I'd slice them and place together on a foam tray covered in clingwrap for another day.

My husband and I were very pleased with our dinner. They were full of flavour and not oily at all.

I give them 8.5 / 10

Hope you try them.

Bye for Now

NB: I understand that as a follower - you may NOT be getting my updates on your reading list. If you are having this trouble, click on the "add" button on your reading list and physically type in the whole blog address. This may kick-start google.


Sunday, April 8, 2012

COOKING: White Chocolate and Passionfruit Mousse (served in Chocolate Eggs)


I needed a nice, naughty and chocolatey dessert for Easter Sunday with the family. When I saw this recipe I fondly thought of my home grown passionfruit pulp frozen in batches in my freezer. I was sold.

The end result. Served in a 90 gram egg, held within a tea-cup. Cute huh?


INGREDIENTS:

(Serves 8)
  • 3 egg yolks
  • 1/4 cup castor sugar
  • 1/2 cup fresh passionfruit pulp
  • 200g white chocolate
  • 300ml thickened cream
  • 1 Tablespoon icing sugar
  • 3 egg whites
  • 8 x 90g chocolate easter eggs
  • small eggs for decoration

METHOD: Have a look at step 7 - you may want to do this FIRST as I did. Then you are super ready.

1. Melt the white chocolate and set aside.
2. Use an electric beater to beat the egg yolks and caster sugar until pale and creamy. 
3. Fold in passionfruit pulp and cooled white chocolate. If the chocolate is too warm the mix may seize.
4. Beat the thickened cream until soft peaks form, then beat in the icing sugar - only beat for a further 1/2 minute on low speed - do not overwhip.
5. Wash the beaters well, dry them, and beat the egg whites in a separate bowl until firm peaks form.
6. Fold the cream and egg whites carefully into the passionfruit mixture. Go slow - if you take out too much of the whipped air at this stage, the mousse will not be light and fluffy.
7. Unwrap the tops of the chocolate eggs and take a small sharp knife - cut the very top off. Then use your fingers to break small pieces off the sides till 1/3 of the egg is gone. Chose cups or mugs which hold the eggs firmly and set them within.
8. Fill the eggs with the mousse and chill for 3-4 hours or overnight until set.
9. Decorate with chocolate shards, sprinkles or little eggs and serve.

Original recipe was sourced from Michelle Southan, Fresh Living Magazine, 28th March 2005, page 36. I changed it a bit.


I melted the white chocolate in my trusty pyrex jug in the microwave - took about 1 min 45 seconds on HIGH.


Getting ready to whip the egg yolks and sugar to creamy stage.


Getting ready to fold in the cooled chocolate and passionfruit pulp.


Folded successfully - no seizing!!!! YAY!


Whipped the cream, then added the icing sugar and whipping a little more.


Dropped the cream into the passionfruit mix...... a little fold....


Then finished the folding process with the egg whites. Be patient, be slow.


Lovely fluffy mixture was then filled into the eggs - divide between the eggs.


Because I needed to transport these to my Dads' place the next morning - I found it handy to re-fold the wrapper over the top of the eggs, prior to putting them in a sealed container for chilling.


RESULT:   Really, really good. I score them a 9.5 / 10.


But I am a white chocolate freak!!!


Monday, April 2, 2012

COOKING: No-Bake Chocolate Eclair Dessert

I was doing some web surfing and came across some "no-bake" recipes. My search was narrowed down when I decided to have a go at this dessert. A great frustration for us Aussie cooks is looking at American recipes, and finding the ingredients a total mystery! There seems to be a larger variety of supermarket products, and many of them we have never seen nor heard of. This means we need to improvise a lot.

There is a great blog called " The Kitchen is My Playground" and if you CLICK HERE this link should take you to the original recipe.

The problems for me were: we don't have Graham Crackers here, nor Cool Whip, and I couldn't be confident our "vanilla instant puddings" were the same as the weight quantities in the packages were different.

I also am guilty of "ditzing" with recipes anyway..... and it is rare that I don't change them about a bit.

OK - here we go:

In a dish - place a single layer of Arnott's Lattice Biscuits (packet is pictured later in this post)  and trim to fit.


In a bowl - whip 300ml cream - and as the cream begins to get thick - add two tablespoons of icing sugar. Whip to firm peaks.


In another bowl, measure 700ml of full cream milk, and sprinkle over the packet of Vanilla Instant Pudding mix.


With the electric mixer, whip for 2 mins until thickened.


Swap to a normal whisk.


Add in the whipped cream and 2 teaspoons vanilla extract. When combined, open another packet of Instant Pudding, and sprinkle over two heaped tablespoons of mix and stir in.


Put half the cream/pudding mixture over the biscuits, and smooth flat.


Place another layer of biscuits over the top. Cover these with the last half of cream/pudding mix.


Here is the packet picture I promised.


Final layer of biscuits complete. Another biscuit would have filled the gaps - maybe I shouldn't have sampled some before finishing the build. I didn't have lunch. Ooops.

Pop into the fridge.


Now for the chocolate top layer. Here is where I followed the recipe. 1 cup white sugar, 1/3 cup cocoa and 1/4 cup milk - place into medium saucepan.


 Stir together in the pan and place onto medium heat.


Bring to the boil, and boil for 1 minute stirring constantly. Remove from heat.


I transferred it to another bowl to help with cooling. Then I had to work out how many grams was "a stick" of butter (113g) so I cubed this, measured it and after a minute or so, added it.


Along with 1 teaspoon vanilla extract. Mix really well. I left it to cool (about 10 mins or so) while giving the odd stir. I was worried about pouring this chocolate over the dessert if it was too warm.


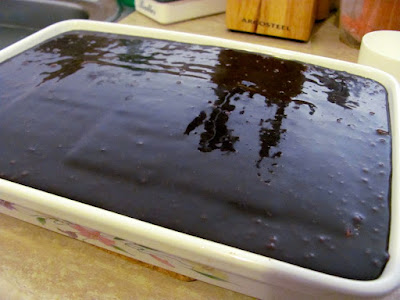
Pour and smooth over the top layer of biscuits. Cover with clingwrap and pop into the fridge. Leave Overnight (the biscuits need to soften a bit).


Invite a bunch of dessert loving, greedy people over. Warm a knife and start slicing.


Stand back to avoid the direct stampede of appreciative guests flocking into kitchen to score their slices.


Big Thumbs Up (!) 


On trying to suggest ways to improve this dessert - my husband suggested less pudding/cream volume. This dessert square did "squoosh" a bit (when the fork plunged in) because of the firmish biscuit layer, as opposed to the soft cream/pudding layer. Less soft stuff might physically stabilise it a bit better - but the overall taste was AMAZING. I gave it a 9/10!!!


This would easily serve 10 or 12 people. Great buffet dish.