Tuesday, July 22, 2014

COOKING: Triple Chocolate Mud Pie


It just so happens that my husband is not really a "sweets" person. His favourites, though, in this category are: Ice Cream and Mud Cake.

He recently had a Birthday Dinner where we invited his two adult children and their partners plus children. I made a wonderful roast lamb dinner, and left it up to husband to choose the sweets course.

I assisted his decision by showing him the front of my favourite "foodie" magazine .... Super Food Ideas (August 2012):

Gloriously Gooey - Triple Chocolate Mud Pie.

He was sold.


This was mine. I HAD to include white chocolate in my curls on top - but that was the only real change I made.

It was fairly easy to make - here are some steps which I photographed:

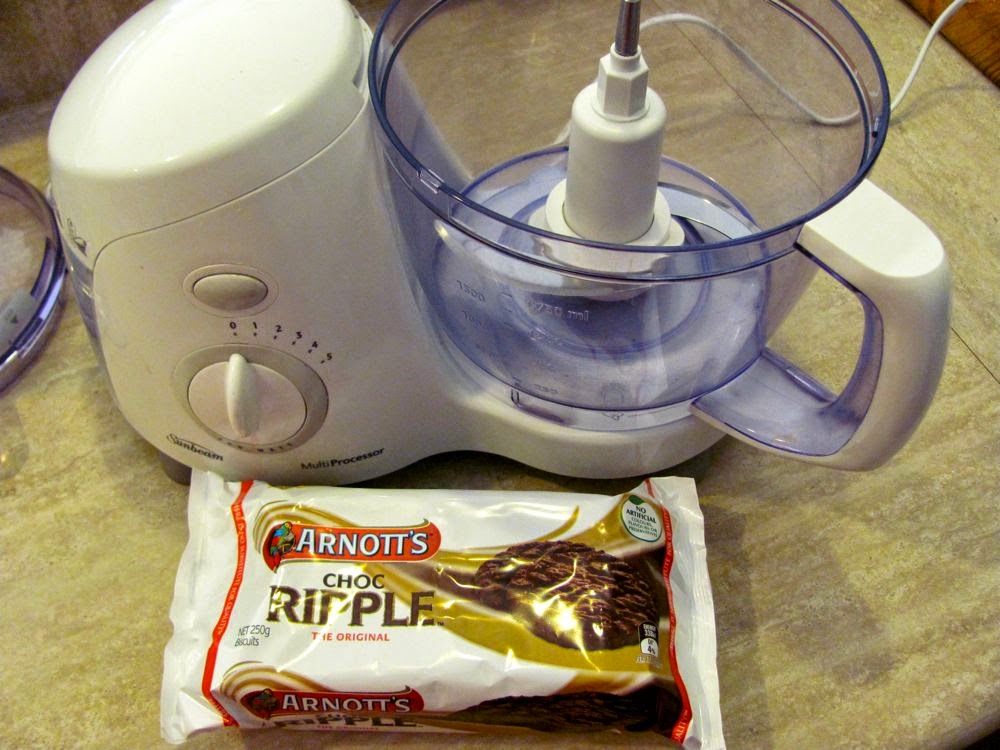
The case calls for Arnott's choc ripple biscuits.


I love my food processor! Make chocolate cookie crumbs.


Melt the butter in the microwave for speed.


You need a 23cm loose base flan tin for this pie.


Make your choccy case.


In a saucepan, make the "brownie" layer. Melt together dark chocolate, butter, sugar, water, instant coffee powder and milk. Stir till sugar dissolved and everything is well combined.


After saucepan mixture is left to cool off a bit.... add the sifted flour and cocoa powder - plus the beaten egg.


Mixture will be thick and lush ... like this - pour into biscuit case and bake for about 35min. 

It should feel firm to touch when done.


Make ganache by combining chocolate and cream together and heat gently. Put 2/3 of your ganache on top of brownie layer when everything is cooled down.


Mmmmmm Chocolately goodness!


To serve. Beat whipping cream with some cocoa and I added a couple of tablespoons of icing sugar as well. Put cream on top of pie and decorate with curls of chocolate and drizzles of ganache.


Serve.


Your guests will be happy.

Our pie served 12 people. This is VERY rich and even a true chocoholic will stop at one small slice.

My biggest tip is to serve this at room temperature - if you make it the day before - you will want to refrigerate it. But allow it time out of the fridge before you add the topping or it will be very hard to get the fork through.

ENJOY!


Sunday, April 6, 2014

CRAFTS: Making Easter Eggs ( Non - edible )


Who doesn't like an Easter Centrepiece for the table??

Two different types of eggs in this basket.


Last year in the post-Easter sales at my local craft store I spotted packs of paper mache and polystyrene craft eggs. They were marked down by 75% - so I couldn't resist.

The paper mache ones were real chicken egg size, and the polystyrene ones were more quail egg size.

First I got out the craft acrylic paints and got to work. I gave the small ones three coats of eggshell colour and when dry - stippled some gold sploges all over each one. Then I gave them a coat of my decoupage gloss medium and varnish.


I bought some basic sheets of stickers and applied one to each egg. To make it sit nice and flat, I snipped around the edges a bit.


Then I finished each one with two generous coats of the gloss medium.


Throughout this whole process I found it useful to stick each egg with a toothpick and spike them into some foam.


The finished products


The paper mache eggs were given a different paint job. Pink, green, blue and peach. I put gold dots on half, and silver stripes on the other half. When dry I gave them two coats of the gloss medium.


I found these very pretty rhinestone stick on gems in my craft store.


Started sticking. I can't resist bling (!!!)


Little stripes on the stripy ones


And two on each dot


Finished


I think these will bring a little Easter Cheer!!


Tuesday, March 18, 2014

CRAFTS: Making Jewellery - Beaded Earrings


Most people who know me are comfortable in describing me as "crafty". I don't mean in a sneaky, conniving way...... I mean in the traditional crafty (making stuff) kinda way. I remember making earrings in High School with horrible cheap tacky plastic beads which were shared between kids - but we were delighted with the outcomes anyway.

I have walked down the aisles of my local "spotlight" store (this is a chain store for homewares, fabrics, manchester and crafts supplies) and I have witnessed the explosion of the jewellery making supplies including beautiful crystal and glass beads, gemstones, and little gold and silver wire things in tiny packets which totally threw me and therefore resulting in me avoiding those aisles entirely. I had no idea about what those things were and no idea as to how to begin to use them.

THEN - my monthly subscription of "Better Homes and Gardens" magazine came to me with a free packet of "kit" earrings attached. They were pretty purple based cluster beads and instead of having nice earrings sent .... the magazine had the cheek to send them in a hundred little beads and bits!!! Hence, I put the little packet into my drawer in the office .... and there they stayed for about 3 years!

OK - so I bit the bullet and started looking at "making cluster beaded earrings on You Tube". Isn't it amazing that you can watch a video of strangers doing just about everything on the internet!!??

I was stuck because I needed small tools as a minimum to get those earrings together. I remembered that my sister has had a "go" at making jewellery so I decided rather than launch into spending a lot of money on setting up a kit ..... I'd use my sisters to see if I liked this whole business. She was more than happy as she had spent a small fortune on setting up her crate and due to some limitations in her wrist and grip strength .... does not make much anymore.


 My sister has a HUGE plastic storage crate filled with goodies - here is just a very small snapshot of what I got to play with.

I learned a few things while starting this beading stuff. 1) My eyesight is definitely worse than what I like to think it is!! 2) You need good lighting  3) You drop things about 500 times while trying to put together jump rings and clustery bits and pieces. Imagine holding a continental cucumber in each hand, and then having to pick up and manipulate a matchstick. Imagine! 

I take my hat off to all you Jewellery makers out there.... and to those of you who put your skills onto You Tube and make it look soooooo easy!!

Anyway - now to "Show and Tell" my efforts:

The infamous Purple Cluster Earrings from the Kit!!


Second pair - I wanted to make gold ones.


Then I wanted to make some using these very pretty glass beads.


Who could resist making earrings using these pretty glass beads. The bigger ones are so sparkly!


Finally had to finish up making some using my favourite colour ..... Green! They look wonky on this picture .... but that's what macro mode will do I guess!!


All in all I am very pleased with my efforts. My very good Blogging pal (Di) ( who makes Jewellery for a living) said that I should have a crack at this because she knows I am crafty. I'm not sure if I will continue much past making a few more earrings .... maybe a necklace or two .... but I have to learn about closures and clasps and stuff like that yet.

I've stopped myself from spending up too big on sparkly beads and pink tools .... I think I can share the crate belonging to my sister - and will donate the stuff I have bought so far into the crate.


I'll keep you posted if the beading bug bites me again!!


Thursday, February 6, 2014

FREEDOM: High Tea with the Girls


Sorry it's been so long since my last post. Happy 2014 everyone!

I still remain in contact with 5 girlfriends from High School days. We finished High School in 1984. I still can't believe where the years go!!??

Anyway - we had our first High Tea together last year - and then decided we could do it better (!!) ourselves.

So. I co-ordinated three girls to make a savoury dish, and three girls to make a sweet. We then made a date and time and gathered at the beautiful house of one of our group who happens to be a doctor. No husbands or children....... genius!!

What we didn't plan for was the Hottest February Day in years and years and years!! Was 44.7 degrees celsius in Adelaide (113F) - but we had air conditioning to keep us from melting away!!


I made ribbon sandwiches with Chia bread. The two fillings were Cream Cheese and Cucumber and Lemon Cream Cheese with Smoked Ocean Trout. I got carried away and made Rye Mountain Bread Pinwheels which contained Roast Chicken, Light Mayo and Shredded Lettuce.

The other platter up high contained Prawn Yum Cha with Kecap Manis Sauce (Sweet Soy).


Another dish was Cream Cheese Vol-au-vents with Smoked Salmon and Dill.


Sweets courses next. These were Fresh Fruit Jelly with Coconut Meringues. The friend who made these was delighted to use (FINALLY) these lovely glasses that she received for a wedding gift ..... won't tell you how many years ago!!


Mini Banoffe Pies and Custard Tarts.


Cubed Watermelon and Mango. Much appreciated given the weather!


Mini baked Cheesecakes - soooooo good!

We proved that High Tea is do-able at home. Just grab some good friends and allocate a savoury or sweet dish - then meet. No-one is left to do the lion share of the work and we could laugh, gossip and natter to our hearts content..... and not have to be mindful of the next table of diners!!