Thursday, July 27, 2017

CRAFTS: Mosaic Mirror Garden Ball


I decided that I needed a WOW FACTOR in the very small backyard we now have with the new house. To be honest, I had to find a solution to the stick that held our Rain Gauge in the middle of the yard. It was ugly.

So I spent a little time humming and haaaaa-ing over what to do with the rain gauge to allow us to still have one, but for it to be included in a nice feature.

I had bought a fibrous cement ball which was supposed to be the top of a water feature. It was "down the back" at a garden pot place. It was a creamy colour with a larger hole on one end and a smaller hole on the opposite side. It just so happened the larger hole could fit my plastic gauge!!


Finished and in place.


I decided on a subtle row of glass beads for around the opening.


And put my broken mirror stock to good use. I left the underside blank where the ball would sit on the rocks.


During the grouting process. Had to be careful and take extra time - some mirror bits had very sharp edges. I decided to grout in white - so that the mirror would be the star! 


The exciting bit - placing it for the first time into it's "nest" of river stones. 


Rain Gauge fits and is easily extracted for readings!


All done. Found the perfect pot. When the sun hits it there are lovely sun dots around the fence, yard and eaves. It will be interesting how these go in summer!!

So now I can monitor our rain amounts with style!!

Very pleased with this one!


FREEDOM: Building a House - Selections - Splashback


Next we ventured into the world of Glass Splashbacks. Very exciting as I have only had tiles and laminate for kitchen splashbacks in the past.

Glass splashbacks were included in our building contract. You are allocated an "allowance" value and if your splashback cost is over the allowance, you need to pay the difference. Yep - you guessed right, ours went over by $735.00 !!

 When we went into the showroom, we were faced with 3 walls of glass options like this one:


Lucky for me, I knew what colour I would like (because the kitchen colours had already formed in my head) so I headed straight for the GREENS.


DAINTREE

The Winner.


 They happened to have DAINTREE up and used as a "Mock" Shower splash back in the show room. I knew I made my dream selection.


These were brand new. Sort of a marbly swishy type of finish. They were spectacular and the picture does them no justice.  If only I were a little more "rad"!! Next life I guess *wink*.

Next stop - Cabinetmakers! 


Tuesday, May 16, 2017

FREEDOM: Building a House - Selections - Plumbing.


Further to my first post about building a house, I wanted to document our journey in "Selections" - the builders way of saying - selecting all the house details.

It is daunting and stressful. It didn't help that while we were doing our selection appointments, in the background, we were involved in an intensive time of our lives - selling our previous house. The sales campaign was not going well, and all of the confidence given to us by our sales agent was being eroded week by week by having no firm interest in our house. It was clear that we were not going to obtain a good price, like the one quotes by the agent in the beginning.

This was in the back of my mind while "spending" money during the selections! When you see the words "Upgrade from standard" it means I rejected the standard range included in the build contract and chose something else (something more expensive!).

PLUMBING:

Two of these (left) for the twin vanity in the ensuite. Upgrade from standard.


One of these for main bathroom. Standard. 


Two of these, one in ensuite, one next to main bathroom. Upgrade from standard.


Mixer tap and spout for main bathroom tub. Standard.


Mixer taps for ensuite sinks. Upgrade from standard.


Small vanity and tap for utility room. Upgrade from standard.


Toilet roll holder, hand towel holder, and bath towel holders for all wet areas. Standard. Selected a double bath towel holder for ensuite. Upgrade from standard.


One of two "banks" of taps to choose kitchen and butler's pantry taps. A little daunting.


The winner for the Kitchen. One of the few that have a nice flat lever to operate (arthritis accounted for) and the end of the tap slips out on a hose for versatility. Upgrade from standard.

I chose a pull-out veggie sprayer for the Butler's pantry, but forgot to take a picture. Upgrade from standard.


German import for shower in main bathroom. Upgrade from standard.

I had already bought a special shower head and hose for the ensuite from another source. 


So that was a big afternoon in the Plumbing supplier's showroom. To be honest, I was very disappointed in the standard selections, most of them were VERY basic and ugly. I felt that I had very little option but to upgrade almost everything. $$$$ heaving!

Bye for now!


Sunday, April 30, 2017

FREEDOM: Let's build a House!! ... our Final House!!!


Sorry for my very long absence. We have had real action in our lives to take care of for the last couple of years ... as you will see - and I simply have not had my blogs as top priorities. I always knew that when I was ready, I would sit down and "knuckle down" again. I think the time has come.

When my husband and I bought our first house together in 2001, we enjoyed and loved that house for 14 years. We did a lot of establishment and improvement to it, plus blood, sweat and tears! However, it became clear that the house would not be our final home. My husband is 19 years older than I am, and we knew that in our "golden years" we would need a house on a smaller plot, better security and most of all - no steps! Our house was set on a sloping block and therefore had a two step split in the middle and the house and gardens were set over 3 levels outside. We had steep moss rock steps to access the bottom level and large garage, and I could just see me getting a broken hip in the future! I can be quite clumsy too - and have fallen up and down the two steps inside, landing onto ceramic tiles is never much fun.

So it was on the cards to look for a plot of land, close to our neighbourhood services, and design and build the "final home" for us.

About 800 meters away from our old house a new development was taking shape, and we were waiting for lots to be released closer to our services and shopping centre. In the future it would be very easy to just walk to everything we needed. Eventually, the next stage of the land release happened - and the Oakford Homes saleslady (I'll call her Elly) contacted us to say - come in and discuss the possibilities!

Elly gave us a map of the development section and parcel lots, so we were able to start to shortlist the plot options that suited our needs.

Eventually we chose one, and Elly made sure we secured it.

Here it is:

It's a corner lot, beyond that roundabout. It has great ravine views over to the other side. You will get to see more in future pictures.


Next we had to present a house "wish list" and first rough designs so Elly could begin to put together a house plan. Tom and I both drafted our thoughts and presented them to Elly to begin the work.

This was our chance to have the house design of our my dreams, my husband was happy if the boss I was happy. He really let me have full control. After all, it was the one chance I had to draft my dreams!!!

So a couple months went by, with house plans going to and fro us and the builder, until we were satisfied that the plans were as good as they could be. Every window/door/opening/wall/access/room were looked at and functionality and purpose assessed. It was a really interesting process.

Another appointment with Elly to secure the lot:

No turning back now!


In the background to all this, we were busy selling our house, so we could be ready for when the first major payment instalments were due to begin. In our case there were 5 instalments of the BUILD, the first one due after the concrete foundation was poured.


It was not an easy, fast sale. We had a 12 week contract with our agent, and it sold in the 11th week. We had 9 open house inspections! We got there in the end.... Whew!


We could not resist this corny shot:

The lot was paid for, plans established .... let the building BEGIN!


Before ANY building takes place, clients must make their "selections" .... plumbing fixtures, tiles, grout, cabinetry, major appliances, bricks, roof, door handles, window colours, etc etc. It was daunting! That is the next post!

Thanks for reading!


Tuesday, July 22, 2014

COOKING: Triple Chocolate Mud Pie


It just so happens that my husband is not really a "sweets" person. His favourites, though, in this category are: Ice Cream and Mud Cake.

He recently had a Birthday Dinner where we invited his two adult children and their partners plus children. I made a wonderful roast lamb dinner, and left it up to husband to choose the sweets course.

I assisted his decision by showing him the front of my favourite "foodie" magazine .... Super Food Ideas (August 2012):

Gloriously Gooey - Triple Chocolate Mud Pie.

He was sold.


This was mine. I HAD to include white chocolate in my curls on top - but that was the only real change I made.

It was fairly easy to make - here are some steps which I photographed:

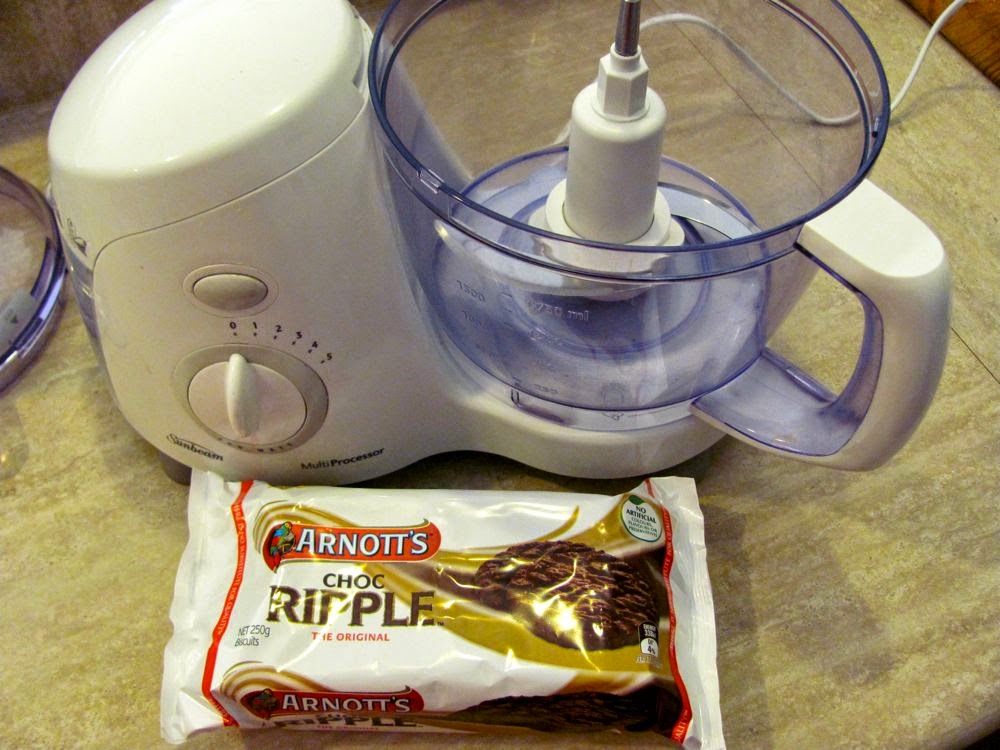
The case calls for Arnott's choc ripple biscuits.


I love my food processor! Make chocolate cookie crumbs.


Melt the butter in the microwave for speed.


You need a 23cm loose base flan tin for this pie.


Make your choccy case.


In a saucepan, make the "brownie" layer. Melt together dark chocolate, butter, sugar, water, instant coffee powder and milk. Stir till sugar dissolved and everything is well combined.


After saucepan mixture is left to cool off a bit.... add the sifted flour and cocoa powder - plus the beaten egg.


Mixture will be thick and lush ... like this - pour into biscuit case and bake for about 35min. 

It should feel firm to touch when done.


Make ganache by combining chocolate and cream together and heat gently. Put 2/3 of your ganache on top of brownie layer when everything is cooled down.


Mmmmmm Chocolately goodness!


To serve. Beat whipping cream with some cocoa and I added a couple of tablespoons of icing sugar as well. Put cream on top of pie and decorate with curls of chocolate and drizzles of ganache.


Serve.


Your guests will be happy.

Our pie served 12 people. This is VERY rich and even a true chocoholic will stop at one small slice.

My biggest tip is to serve this at room temperature - if you make it the day before - you will want to refrigerate it. But allow it time out of the fridge before you add the topping or it will be very hard to get the fork through.

ENJOY!


Sunday, April 6, 2014

CRAFTS: Making Easter Eggs ( Non - edible )


Who doesn't like an Easter Centrepiece for the table??

Two different types of eggs in this basket.


Last year in the post-Easter sales at my local craft store I spotted packs of paper mache and polystyrene craft eggs. They were marked down by 75% - so I couldn't resist.

The paper mache ones were real chicken egg size, and the polystyrene ones were more quail egg size.

First I got out the craft acrylic paints and got to work. I gave the small ones three coats of eggshell colour and when dry - stippled some gold sploges all over each one. Then I gave them a coat of my decoupage gloss medium and varnish.


I bought some basic sheets of stickers and applied one to each egg. To make it sit nice and flat, I snipped around the edges a bit.


Then I finished each one with two generous coats of the gloss medium.


Throughout this whole process I found it useful to stick each egg with a toothpick and spike them into some foam.


The finished products


The paper mache eggs were given a different paint job. Pink, green, blue and peach. I put gold dots on half, and silver stripes on the other half. When dry I gave them two coats of the gloss medium.


I found these very pretty rhinestone stick on gems in my craft store.


Started sticking. I can't resist bling (!!!)


Little stripes on the stripy ones


And two on each dot


Finished


I think these will bring a little Easter Cheer!!